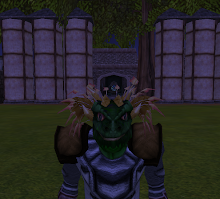

Once you've chosen the race, sex and look of you, and then chosen a name, and clicked that you're ready to go, a brief wait will see you arrive at your first location in Istaria - the basic training area.
You will see the blue window pictured to your right, which asks if you want to continue with the tutorial. If you've played any kind of 3D MMORPG before, you can probably skip this section, as it will largely be telling you how to suck eggs. That said, in truth it's pretty short and some of the controls in Istaria are a tiny bit different to most other games like it, so its probably worth doing just to get your bearings somewhere safe!
Istaria can be a harsh game, compared to most MMOs. On one hand, when you die you don't actually lose anything - equipment, experience points etc. However, you do get 'death points' (or DPs) once you get up a few levels. These can seriously slow down your hunting for the day, as they reduce your stats cumulatively, so it's worth trying to stay alive as much as possible!

If you've decided to stick around, and are completely new to this type of game, it's worth taking a look at a few of the graphics that have just appeared around the edge of your screen (see picture, right). These boxes make up the GUI, or 'graphical user interface' - they give you important information about your character, your surroundings and other players/non player characters (NPCs), as well as options as to what you can do in the game.
One of the great things about Istaria is that every part of the GUI can be moved around your screen to suit the way you want it to look. When you're playing in windowed mode (which means you can still see your Windows bar across the bottom of the screen), you can even make the viewable playing area shrink down to leave a border round the edge for your various menus and tool bars.
However, for now I suggest leaving things where they are, mainly because you'll probably change your mind about what you need to see, and how clearly, once you get a few game hours under your belt. It will also make this tutorial easier to follow!
 First, look at the menu at the top left of your screen, pictured right. Note that this, and all the other boxes on the screen, can be 'right'clicked' to change a few attributes - namely window/border transparency, whether the particular window is locked in place on the screen, and options to show the 'title bar' and to 'auto hide' the box until you scroll over that area of the screen.
 In addition, some - such as this one - have a 'simple mode' option. Generally, this reduces the size of the particular part of the GUI by removing the text and just leaving bars and icons. This is probably worth doing once you've become accustomed to how everything works, as it can greatly reduce clutter on screen.
This first part of GUI is the 'Actions' box. You'll notice four of the eight sections are currently greyed out: this is because something needs to be selected/highlighted by you (such as an NPC, resource, enemy etc) before you can do these actions. To select someone or something, simple hover the cursor over them/it and click the left button - you can try this now by clicking on one the guys in front of you (don't worry, their on your side!).
This menu is fairly straightforward, but is one that personally I only tend to use two buttons of - the top two. 'Recall' teleports you back to wherever you are 'bound'. There is one of these binding points just the other side of Ryson, the guy standing before you.
As your character moves through the world, you'll find it very useful to be able to instantly return to a certain town, or property - for example, to complete a quest or return with resources. This button takes you to that spot. 'Stop action' does what it says on the tin - it will stop you fighting or casting mid spell, or stop crafting etc.
'Attack', 'Greet', 'Trade' and 'Gather' should be self explanatory, starting the action as long as you have the correct type of person or resource selected - you'll find you can normally do these actions by right-clicking the selected object too, which I tend to find more convenient. 'Create' opens the create item menu - more on that later - while 'Sit/Stand' makes you do just that.

The top right corner, pictured here, contains some crucial information. The large box on the left ('Self Status') is particularly important, as it displays some details vital during every combat. The two square boxes on the left show the current action being performed and the next one that is queued up to happen. So, if casting spells in a battle, the top icon will be the spell being cast, and the second the one you have ready to go off immediately afterwards.
Next to this you have four horizontal bars. The full red one at the top shows your current health, as does the number next to it. You'll be keeping an eye on this in combat, if you know what'd good for you! The next two below will track your adventuring experience and crafting experience, showing how close you are to the next level in your currently chosen schools, while the bottom one represents how close to your full carrying capacity you are.
Right of the Self Status box is your compass. A right-click of this will give you the option to 'show position' - you'll find this handy to have on if people give you co-ordinates, or you want to let people know where you are. There is also a 'show map' option, although it's a lot easier to just press 'm' on the keyboard. You'll see the map also shows co-ordinates and allows you to post points of interest, which can be extremely handy! More on the map later though.
Below the compass are two boxes that are also crucial. The first shows any effects that are currently helping, or hindering, your character. Currently, there will probably be a 'Road Bonus' in effect, as you're standing on a road section - move onto the grass, and this will disappear. You need to keep a close eye hear, especially in combat, as effects cast on you by creatures often need to be dispelled before they do some serious damage.
You'll notice a square in the box too, in brown, like the ones in the self status box that show spells you're casting. Here it represents a 'Gift Slot' - these are two-hour bonuses that can be cast on you by players. As you advance in levels, the amount of gifts you can have cast on you at one time will increase.
The black 'Target' box below this contains details about whatever you've currently selected by left-clicking it. If it's a creature or person, it will show the direction they're in, their name, their health and their rating (rating is basically their level). If something doesn't have a rating close to yours, its probably best not to take it on!

Next we have the boxes in the bottom left. The large one is a chat window, the same as the one on the bottom right of the screen. These are very customisable - more on them later.
The vertical bar with the ten numbered squares is again important, as it contains 'Hotkeys'. This is where you can drag various functions such as spells and special attacks to be easily able to use them quickly. You can have lots of these open at once, and once you go up a few levels you'll find you'll probably have at least two or three open at once. If you right click on this Hotkey bar you'll see an option for 'New Hotkey bar'. Once you've clicked this, a second one will appear.
Notice the difference in colour - one has a blue line shading down the centre. This is the 'primary' bar, and can be changed by right-clicking another bar and selecting 'Set as primary'. While you're playing, you'll be able to cast any spell or use any effect in these bars by left-clicking them with the mouse when your cursor is over it. However, the primary is also connected to the numbers on your keyboard, which many people find much easier to use in dicey situations.
And finally for now, the blue button bottom left. This is a key area, as it takes you to a mass of menus that open up all kinds of goodies - including any of these boxes if you've closed them by accident! I'll leave you to mess around in here, while I go and get a well-deserved coffee...
For more information, check out the official website at www.istaria.com
No comments:
Post a Comment